Let me start this article by addressing the elephant in the room: if you want a real authentic film look, shoot film! There’s just no way around that, no matter how close you can get with digital these days, there’s something about film that digital just can’t touch. I’ve been shooting film sporadically over the last couple of years and I still get a big ol’ smile on my face when I get the scans back from the lab, it’s a very different kind of reward than the immediacy of digital. Plus, the experience of shooting film has been extremely helpful for my digital photography – shooting with an old film camera forces you to slow down, learn the basics of the exposure triangle and focus on composition, as opposed to navigating through menus and letting the camera decide all of the settings for you.

My trusted Canon A1 ready for summer vacations
But of course there are a large number of practical reasons for shooting digital, and at least for my needs and reality shooting film exclusively is just not an option. I shoot digital 95% of the time, but I always strive to make my photos look as “organic” and close to film as possible, because that’s the aesthetic I like the most.
For the purpose of writing this article I’ve questioned myself where does my fascination with film come from, and I guess it’s probably due to the fact that all of my childhood and teenage memories where shot on film. When I think about film I think about long summer vacations, family get-togethers and embarrassing haircuts – in other words, instant nostalgia! And that’s the kind of warm-fuzzy feelings that I want to associate with my photos, so basically ever since I got my first mirrorless camera back in 2015 that has always been my reference.

The first roll of film I ever shot when I was around 10, with a tiny plastic 110mm film camera
Over the course of these last 3 years trying to emulate film I’ve tried dozens of different presets for Lightroom, some of them really good, but quickly discovered that these will only get you halfway there. If you apply a film-preset to a perfect digital image file, in most cases you’ll end up with a perfect digital image with some vintage tones, but there’s much more to film than that! There are a lot of “imperfections” that come from the limitations imposed by the gear used and the film itself, which have been eliminated in modern digital cameras and just can’t be introduced in post-editing.
The best way I’ve found to mimic these imperfections is to actually impose some of those same limitations when shooting digital, so here’s a few tips on how to do that:
1. Use vintage lenses

Modern lens are amazing pieces of technology. Most of them offer perfect corner to corner sharpness, great anti-flare coatings, amazing contrast, you name it. But if you’re going for that 70s / 80s consumer film look, that’s pretty much the opposite of what you need! Lenses back then where far from the perfection we know today, the consumer photography market was booming and there were a lot of different brands coming up with different designs, new materials, new focusing systems, etc. As a result, each lens had its very particular set of characteristics and quirks (sometimes design flaws, really) that got imprinted into every photo taken and ultimately defined its character. A perfect example of this are the Helios 44M lenses: these Russian copies of the Carl Zeiss Biotar became famous for a design flaw that resulted in a very unusual swirly bokeh. Earlier models displayed this effect very pronouncedly, but as they improved the design in subsequent versions that particular characteristic was lost, and that’s why the earlier models are the most sought after nowadays.

That classic Helios 44M-4 swirly bokeh
The good news is that these old manual lenses are (for the most part) dirt cheap and you can use them on mirrorless cameras with a simple plastic adapter, so you can get that specific look they were known for without any need for Instagram filters or post-processing magic! I wrote an article where I go into more detail on how to use these vintage lenses, you can find it here.
2. Use manual focus

One of the biggest innovations in photography in the late 70s/early 80s was the invention of autofocus. Before that cameras were limited to manual focus, and even when the first AF systems were introduced to the consumer market they were rudimentary at best. Chances are that if you look at your film photos from that period, half of them will be slightly out of focus (or completely out of focus, depending on the competence of the photographer! ;)) But that’s not a bad thing at all, I feel that in most cases it only adds to the nostalgic feeling and can sometimes create an additional layer of mystery.
The missed focus on this one adds to the timeless feel
So if you want that classic film look, switch to manual focus on your modern digital camera or use an old manual lens. Don’t be afraid to miss focus sometimes, this was something that took me quite a while to realize and “accept”, and I only did so thanks to shooting film. Some of my favorite photos shot on film are pretty out of focus!
Blurry? Definitely, but the fact that you can’t distinguish their faces makes this much more universal
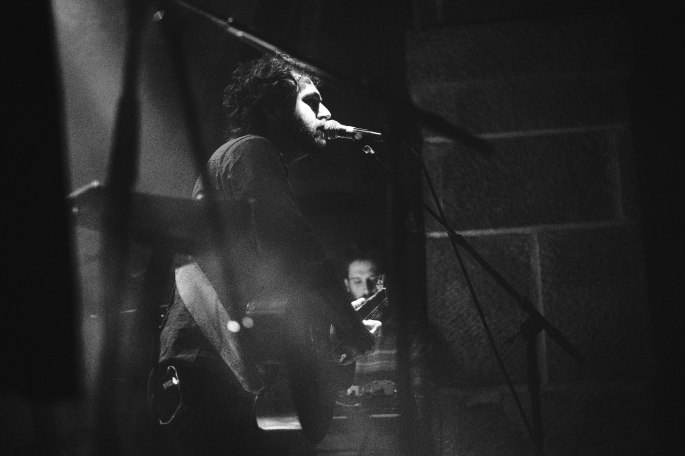
3. Use slow shutter speeds

Another limitation of film is the maximum ISO speed available, or Asa as it was called originally. Nowadays our digital cameras have incredibly high ISO sensitivities, but on film the maximum you get is 3200, though most consumer films are rated at 200 or 400 Asa. This means that to get a proper exposure on film you have to use much lower shutter speeds than on digital to get enough light, and as a result motion blur is highly likely. Personally, I love some blur, as it gives a sense of movement to an otherwise static medium. One of my favorite all time photographers, Anton Corbijn, shot many of the world’s most famous bands and musicians on film using slow-shutter speeds, to get some movement in the frame and that extra grit!


The subway rush – shot on a Huawei P10 smartphone
If you wanna try this out, I would advise to start with 1/30th of a second, look at the results and then adjust as necessary. If you’re shooting in bright sunlight this probably won’t work unless you use a neutral density, but again experimentation in the key.
A little extra tip: smartphones are actually great for this if you turn off the flash, as their small lens aperture and tiny sensor force slower shutter speeds to compensate.
4. Use High-ISOs for authentic film-like grain
This tip is in direct contradiction with the previous one (unless you’re shooting in really low-light), so usually you’ll have to choose between one or the other. It is also a tip specific to the Fuji X series cameras, as I haven’t tested other brands in this particular aspect.
I’m a big fan of grainy photos, it’s one of my favorite things about film. But the technology in digital cameras these days is so good that in most scenarios you’ll get perfectly clean images straight out of the camera. Even though image-editing software has also evolved tremendously in the past few years and can deliver very believable grain simulations, I’ll be the first to admit that it’s not the same as the real deal and it also feels kinda like cheating to be adding fake grain. That’s where the Fuji X-trans sensors come in, in particular their latest iteration X-trans III.

My furry friend shot at ISO 12800
The ACROS film simulation when used with high-ISOs of 6400 and above produces some digital noise that, to my eyes, is very very close to real Black and White film grain – and the best part is that you’re not adding anything fake in post-processing, it’s a real side-effect of ISO just like with real film! So most of the times when I want to shoot in Black & White I’ll use my own Acros custom settings at 12800 ISO and use the SOOC jpegs. This technique also works with color film simulations, but not so well in my opinion.
5. Post-process your photos accordingly

Different films have different characteristics, so it’s important to decide exactly what film look are you going for and learn a bit more about what defines it. Is it a low-contrast or a high-contrast film? saturated or muted? Fine grain or heavy grain? These things will help you understand what you can do in post-processing to get closer to that film look, and most of them are very simple to adjust. Where it gets a bit more complicated is getting the right tones to match the original film stock, but with some investigation and patience it can be done.
Going for that warm Kodak vibe
Of course if you want to save time you can just buy one of the many film presets out there! Like I said in the beginning of this article they will get you close to the original film tones, so if your base digital file already contains some “imperfections” introduced with the techniques above, it’s as close as you’ll get to the real thing. You can also use in-camera film simulation settings to mimic some film types, which I already covered in my previous article.
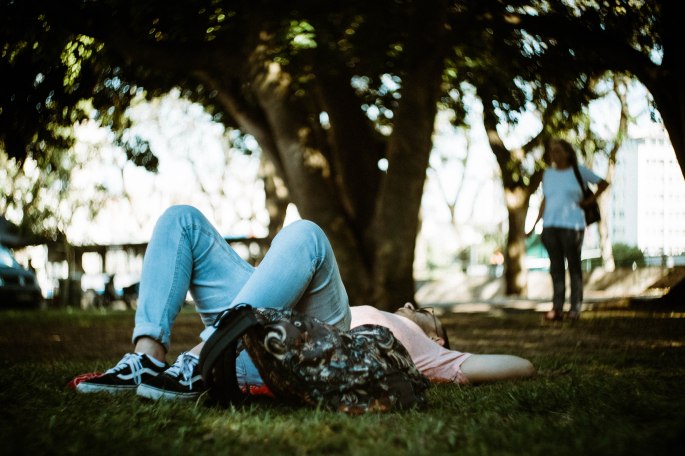
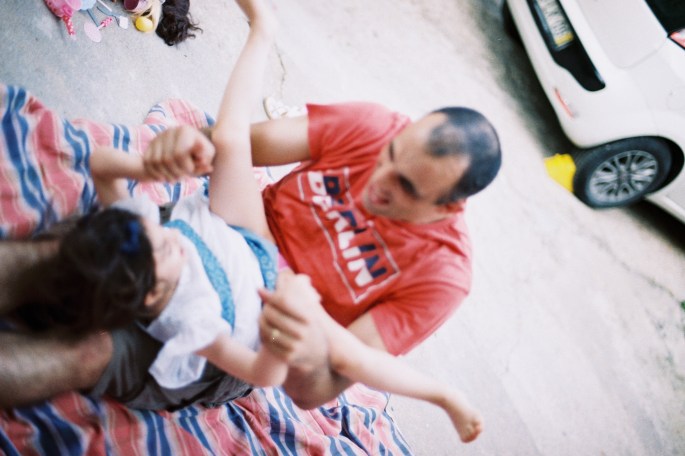
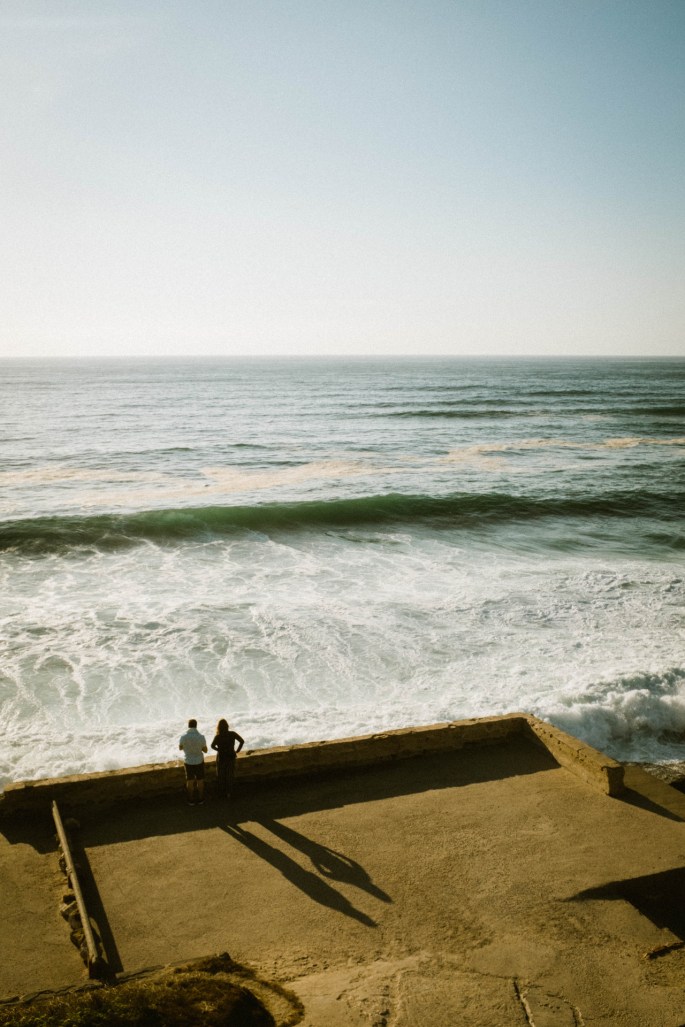
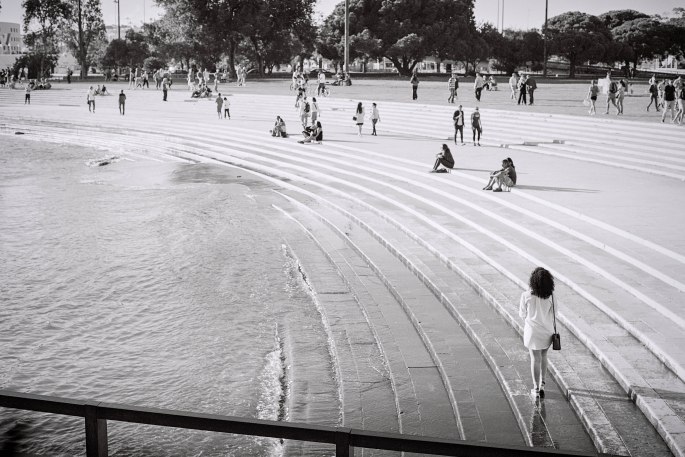
Can you tell which is which?
These are some of the techniques I’ve learned by trial and error mostly, I hope you’ll find them useful if the film look is your thing too. I can’t stress enough that the best thing you can do is to actually shoot film whenever possible, not only it will be great fun but it will surely improve your digital photography as well.
Let’s end this with a fun little game: can you tell which of the photos below are film and which are digital? No cheating looking in the exif data!


Lovely article. I also really liked the one on your film simulations. I come from film (which I still shoot), but time reasons have made me move to digital and I’m forever on my quest to find my “digital look” but it really needs to be based on film. Your photos are very similar to film, not only in the processing, but the other aspects of the “analog experience”.
Keep on keepin’ on…
LikeLike
Thank you so much Olivier, really glad you found this useful! I much prefer the look of film myself, if only there was a quick and cheap way to develop films at home… but since there isn’t, I try to get as close as possible with digital using all these “tricks”. 🙂
LikeLike
amazing photos!
LikeLiked by 1 person
Thank you so much! 😊
LikeLike
Lovely article Luis! I need to know, if this is digital, which recipe was this photo using? https://lifeunintendedavisualdiary.files.wordpress.com/2018/08/tumblr_oxu5g0ztyp1wx3muuo5_r1_1280.jpg?w=1024 In love with it. Cheers!
LikeLiked by 1 person
Hi there! Thank you! 🙂 This is digital, but I used some preset back then which I can’t remember what it was.
LikeLike