Like so many other Fujifilm users out there, one of the main things that drew me into the X series system was the quality of their jpg files and the film simulations. The colors and details are just stunning, and as someone who grew up with film photography in the 80s, the idea of having film simulations directly in the camera was just perfect!
That being said, as much as I appreciated the quality of the jpgs, I almost always ended up working on the raw files for the added post-processing flexibility and to get a more stylized look. It’s nothing short of amazing the range you get when editing Fujifilm’s raf files, especially when it comes to recovering shadows and highlights. But the greatest thing about working in raw quickly became my biggest problem: the endless possibilities provided by editing these files means it’s a never-ending task. You can get as many different looks as you want, none necessarily “better” than the others, just different. Choosing between them became an extremely time consuming task and it got to the point where I would sometimes spend over half-an-hour with a single photo going back and forth between different looks.
Earlier in 2018 I realized that I should really spend less time editing and more time shooting, so I decided to use the jpgs instead of the raw files as much as possible. I began exploring different possibilities using the in-camera film simulation settings and came across Ritchie Roesch‘s “Fuji X Weekly” blog, which features some really excellent Fujifilm recipes inspired by classic films. This site was a real game changer, as it allowed me to emulate directly in the camera many of the looks that I was trying to recreate using Lightroom presets. My favorites so far have been the Kodachrome simulations (both the Vintage Kodachrome and Kodachrome II) and Fuji Superia 800, but they’re really all quite excellent and cover an enormous range of looks.
Some jpg examples shot using Ritchie’s Vintage Kodachrome and Fuji Superia 800 recipes
One of the things that I was also hoping to achieve by shooting jpg was to get a more consistent look in my photos, but looking back that never really happened because I kept changing back and forth between all of those recipes! So in order to simplify my shooting process and get more consistent results, I decided to stick with just one color simulation and one black & white simulation recipe.
Update 08-08-2021: I’ve shared some new Fuji recipes here.
Color
For my color simulation, I took several ideas from Ritchie’s Fuji recipes and mashed them all into one. Something that I realized from using his simulations is that the biggest defining factor in the final look of the jpg is the Auto White Balance shift applied. I’m a big fan of Kodak’s tones – especially in its slide films – so my color simulation is geared towards that warmer look, but you can change that just by changing the WB shift. For example, if you prefer Fuji’s classic film tones, you can change the WB shift to -2 Red to enhance the greens.
Originally I came up with this recipe when I was using a Fujifilm X-T20, but since then I’ve also owned a X-Pro1 which didn’t have Classic Chrome available, and now I’m using a X-Pro3 which has the amazing new Classic Negative. So I’ve had to tweak my color recipe a few times along the way to fit each camera generation – they’re not exact matches, of course, but I believe they have the same overall vibe.
Below you’ll find the different iterations of my recipe for the different camera/sensor generations (there is no X-Trans II version, but you can easily use the X-Trans III recipe for those cameras with some minor adjustments).
X-trans IV recipe (X-Pro 3, x100V, X-T4)
Back when the X-Pro3 was announced I was very skeptical on some of the hardware design changes, but one thing that immediately got me excited was the jpg-oriented software updates and specifically the new Classic Negative film simulation. It was love at first sight as soon as I saw Jonas Rask’s images with this film sim, as it seemed to fit my “film-look” aesthetic right out of the box. It’s no wonder that as soon as I got my own X-pro3, I set it to Classic Negative and pretty much never changed it since!
At first I just replicated the settings from my X-trans III recipe using Classic Negative instead of Classic Chrome, but after using it for a while and playing around with some of the new options like Color Chrome Effect and FX Blue, I’ve mostly settled on the settings below. One option where I still have some doubts is the grain effect… I feel the new size option is a definite improvement, but somehow I still don’t find it as convincing as the grain from Capture One, let alone real film. But at least for now I’m leaving it on, just so I can get a final image straight out of camera.
- Film simulation: Classic Negative
- Dynamic Range: DR200
- Auto-WB Shift: +4 Red, -4 Blue
- Highlights: +1
- Shadows: +0
- Color: +3 (sometimes I’ll drop it to +1 when I want a less saturated look)
- Noise reduction: -4
- Clarity: 0
- Sharpening: 0
- Grain effect: Strong
- Grain size: Large
- Color chrome fx: Off
- Color chrome blue: Weak
- Exposure compensation: typically between +1/3 and +1
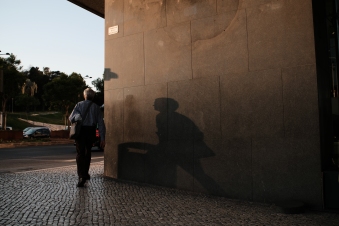
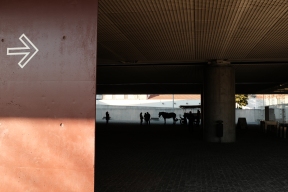
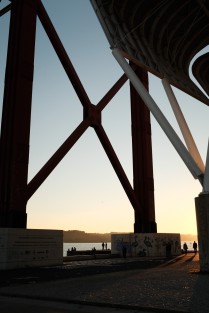
Samples:
X-trans III recipe (X-T2, X-T20, X-Pro2, X-E3, X100F, X-H1)
This was my first recipe and it still holds a special place in my heart. I love its look and it’s the one I currently use on my x100F:
- Film simulation: Classic Chrome
- Dynamic Range: DR200
- Auto-WB Shift: +4 Red, -5 Blue
- Highlights: +1
- Shadows: +1
- Color: +3
- Noise reduction: -4
- Sharpening: 0
- Grain effect: Off
- Exposure compensation: typically between +1/3 and +2/3
Samples:
X-trans I recipe (X-Pro1, X-E1, X-M1)
Since the first-generation X cameras didn’t have Classic Negative or Classic Chrome, I had to try out different alternatives to get close to the look of my original color recipe. After much trial and error, I settled on the settings below that I used almost exclusively on the X-Pro1 during the time that I had it:
- Film simulation: Astia
- Dynamic Range: DR200
- Auto-WB Shift: +4 Red, -5 Blue
- Highlights: +1
- Shadows: +1
- Color: -2
- Noise reduction: -2
- Sharpening: 0
- Exposure compensation: typically between +1/3 and +2/3
Samples:
Black and white
When it comes to monochrome images, I still use the same recipe that I came up with once I upgraded to an X-trans III camera many years ago. I’m a fan of contrasty, grainy images when it comes to B&W, so I experimented a bit and discovered that the Acros film sim when shot at high ISOs produces some very film-like grain, which looks much more natural than the grain effect in the film sim settings. This works particularly well with older legacy lenses, because of their natural imperfections compared to current lenses.
- Film simulation: Acros Red
- Dynamic Range: DR200
- Highlights: +3
- Shadows: +4
- Noise reduction: -4
- Sharpening: -1
- Grain effect: off
- Exposure compensation: between +1/3 and +2/3
- ISO: usually 12800 but sometimes I’ll switch to Auto-ISO with a minimum of 2000 if there’s too much light or if I want less grain
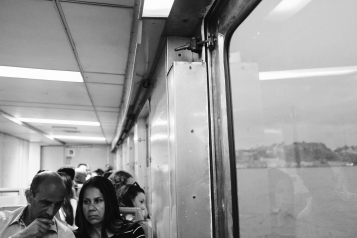
Samples:
Post-processing
While most of the times I use the camera jpgs instead of the raw files, I still run them through Capture One to do some quick adjustments. I have a custom user style that I apply upon importing the jpgs, which does the following:
- adds a slight vignette
- adds a slight fade on the shadows using the tone curve
- adds a tiny amount of clarity
- applies a greenish tint to the shadows.
The differences compared to the original jpg are pretty subtle, as you can see on this example (left is the original, edit on the right):
And that’s it. This workflow has dramatically reduced my editing time on the computer and also helped me to focus on getting things right in camera, instead of shooting mindlessly and hopping to fix it in post.
Don’t get me wrong though, I’m not a “jpg fundamentalist” – I still use the raf files sometimes, either when the lightning conditions are more challenging or when I want a crazier look just for fun. And of course there are plenty of situations (especially for those doing professional paid work) where the flexibility of Raw is a must.
But for amateurs like me who use photography to document their everyday life and the world around them, I strongly recommend giving it a try, I think you’ll be surprised with how liberating it is.











I love using the Fuji film simulations – on that Fuji X Weekly article you mention I like using the Portra one although the WB setting is never right for me!
LikeLiked by 1 person
Yeah, I know, I never warmed up to that Portra simulation because I couldn’t get the WB right either. But Ritchie has come up with some amazing simulations, I use them all the time!
LikeLike
I was in a similar situation because the custom WB that the Portra recipe mentions may not have any previously set value. I suggest you reset your custom WB that you use for Portra recipe once with a white card (maybe in daylight).
LikeLiked by 1 person
Luís, I shoot with one of Ritchie’s or your film simulation recipes regularly. But … I still find that I want to tweak each image just a bit. I am also frustrated that after pulling in the RAF to Lightroom I have no way to re-apply that film simulation recipe ot the RAF. 😦
LikeLiked by 1 person
Have you tried importing the jpgs to lightroom instead of the Rafs? I also find myself wanting to do some minor adjustments in the jpgs, so what I do is I import them to lightroom and apply a preset with the adjustments that I need. It’s much faster than starting from scratch with the Raf files!
LikeLike
Hi Luis, I don’t want to be stuck with just a JPG. It’s like making a print and throwing away the film negative.
LikeLiked by 1 person
Oh, I don’t throw away the Rafs, I keep them on an external drive for backup. And I still import them to lightroom sometimes, if I’m not happy with the jpgs.
That being said, it shouldn’t be too hard to replicate this look with the Rafs in lightroom. If you shoot with high ISOs the grain/noise will already the there, it’s just a matter of applying the Acros red profile and bumping up the contrast a bit.
LikeLiked by 1 person
I have imported the JPEG+RAW but … that uses so much disk space. So … I have opted to push the JPEGs to my iPhone for posting and import the RAF to Lightroom. The JPEGs are ephemeral. Sigh.
LikeLiked by 1 person
I really like the BW pics!
LikeLike
Thank you! That’s my main B&W simulation, I almost never process the raws in those files.
LikeLike
It might be best to highlight which sections were uofadetd. I have no idea what was written in the original.
LikeLike
The new part is my color film simulation settings, previously I had been using exclusively Ritchie’s recipes for color work!
LikeLike
Thanks for the article and the diverse array of sample photos to give us an idea of what your recipe looks like in different contexts. I plugged your color settings into my xt2 and am going to go out today and try it out.
LikeLike
Thanks for reading it, hope you’ll find them useful too! 🙂
LikeLike
Beautiful color setting there! Thanks for sharing with us 🙂
LikeLike
Thank you for the feedback, glad you liked it! 🙂
LikeLike
Awesome photos and a great write-up!
Just got the X-T2 and have been taking it everywhere the last couple of days documenting everything going on around me.
I dig the film simulations onboard. I also shoot 35mm film and usually have a roll of Fujifilm Superia 400 in my Nikon FE. That had a lot to do with my decision to purchase the X-T2.
LikeLiked by 1 person
Thank you so much for your kind words. The Fuji’s are indeed the perfect cameras to carry around with you everywhere, I think that’s one of the main advantages of the system.
I have a roll of Superia 400 waiting in the fridge, I’ve never tried one yet but I love some of the photos I’ve seen of others taken with that film. I really wish Fuji would create a Superia simulation on the X series cameres!
LikeLike
Nice photos, i recently tried out film simulations in camera myself, it’s been fun!
LikeLike
Thank you Janice, I’m glad you found them useful! 🙂
LikeLike
Just discovered your blog, love it! How would I reproduce these in older x trans sensor? I have a X Pro-1 and Ive been experimenting for about a year now and really love all these simulation recipes but the white balance never seem to come out remotely close, any suggestions?
LikeLike
Thank you Solomon! 🙂 I use the x-pro1 a lot actually, many of the photos I’ve posted in the last months have been taken with it (https://lifeunintended.com/tag/fuji-x-pro1/). I always use the same camera settings on the x-pro1, which are: Auto ISO, Auto DR, Astia, Color -2, NR -2, H: 0, S: 0 (or 1), WB shift R4 B-5. Most of the times I use the camera jpgs with just minor tweaks in Capture One, I love the “softer” tones of the X-trans1 sensor!
LikeLike
Thank you for the quick reply will definitely be trying these settings out this weekend. Yes I fell in love with the way it renders colors and soft tones. For your black and whites do you use the above Acros+R setting as well?
LikeLike
Most of the times, yeah. Sometimes I also use a Capture One preset pack called “the classic presets”, it has some great classic film simulations as well.
LikeLike
Thanks for the recipes! What white balance settings do you use for your B&W recipe on the X-Trans III (X100F) sensor?
LikeLiked by 1 person
My pleasure! I use neutral WB on all my B&W recipes.
LikeLike
Thanks!
LikeLike
Hi, I really love the look of your X-trans IV recipe but I own a X-T30 without some options. Can u tell me the recipe so it works correctly on my camera? Thank you!
LikeLike
Hi! Unfortunately that’s not possible, considering the original X-T30 doesn’t have Classic Negative. 😦
LikeLike
Ah shit… what a pity. Your X-trans IV recipe is one of the best I’ve seen. Is there no other way so I could get similair results? Or maybe u could suggest or onces I could try?
LikeLiked by 1 person
Thanks a lot! I’ve seen some recipes online trying to mimic Classic Negative without having Classic Negative, but to be honest I never found them very similar.
I think your best option for now is to use recipes based on other film simulations (there are a lot of great ones out there), and then eventually upgrading to the new X-T30 version when you have the chance to get Classic Negative and others.
LikeLike
Love the recipe for x100f, now loaded on my camera. I’ve started using the darkroom app, coz I can also add vignette, lift shadows and do much more to the jpegs. Plus it overjoyed the existing file so u don’t have duplicates. Works great with iOS. I’ve since stopped using Lightroom to tweak and it’s allowed me edit on the go and spend more time shooting.
LikeLiked by 1 person
Thanks a lot for your work – I just wonder, how you call your color simulation, you posted above. I just programmed my X100V with this recipe and the next will hopefully shine 🙂
Best wishes – Andreas
LikeLiked by 1 person
Thank you very much! I’m terrible with titles so I never named it! :p
LikeLike
Just found your wonderful blog. Your work really inspiring. Are you on instagram?
LikeLiked by 1 person
Thanks a lot! 🙂 I do, it’s https://www.instagram.com/luiscosta76/
LikeLike
Fantastic recipes, Luis.
I’m using your colour recipe on my (recently acquired) X-T3. It isn’t quite the same as the Classic Neg I was using on my previous Fuji, an X-Pro3 – but its differences are both subtle and intriguing.
Your photographs have qualities which I find it difficult to accurately put into words. Which is a little ironic, considering that I am a writer. But perhaps that is one of the many things that distinguish them (your photos, I mean) – they are hard to pigeonhole, they defy simple categorizations.
In any case, my real and sincere thanks for your recipe.
Cheers from Oregon!
Miguel
LikeLiked by 1 person
Man, that’s one of the best compliments I’ve ever gotten… I love art that cannot be easily categorized, so for someone to say that about my photographs is just incredible, thank you very much for sharing that!
I’m glad you’re enjoying the recipes, Fuji cameras are the best for those of us who don’t like wasting time editing images. 🙂
LikeLiked by 1 person
Hi – I wanted to thank you for sharing your simulations. I have a newer sensor camera but I also have an X-E1 that I have cherished for many years and there aren’t too many sites with SIMS for that generation of camera. A few months ago I programmed the X-PRO1 recipe above and it is now the SIM that I use almost 100% of the time in that camera. Thanks for sharing 🙂
LikeLiked by 1 person
Thank you so much for the kind words! 🙏 I also have a X-E1 (the x-pro1 is long gone) and that’s still the only color recipe I use on that camera. 🙂
LikeLike
HI, wonderful pictures! I just wondered what recipe you used on the pics with the ship on top of this page?! Thank you in advance!
LikeLike
Hi Roman, thank you for the kind words! 🙂 It was Fuji X Weekly’s “Fuji Superia 800” simulation.
LikeLike